Showing posts with label cookies. Show all posts

Wednesday, August 30, 2017

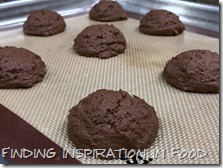
Chocolate Rum Cookies

IMG_2039 (800x600)

I’m pretty sure I need more than just “rum cookies” to get me through this time! I did so good not drinking or stress eating the entire time, and I’m happy to report my family is safe and dry, but may of our friends around us are not. I’m going to do a few scheduled post while we are trapped in our neighborhood, but just a heads up I’ll be spreading them out instead of regular ones as we volunteer and help others in our area who are not as lucky as we are. It’s a time to come together as one and help our fellow people out. I’ll try to do some live updates on Facebook so be sure to follow me there.

These cookies are really easy to make and taste light fluffy and full f rum flavor! One of our new favs!!

Chocolate Rum Cookies

(Adapted from Amandeleine)


Printer Friendly Version


3 cups all-purpose flour

1 1/2 cups unsweetened cocoa powder (not Dutch-process)

1 tablespoon baking powder

1/2 teaspoon salt

3 sticks (1 1/2 cups) unsalted butter, softened

2 cups sugar

1/3 cup dark rum

2 large eggs


Preheat oven to 325°F.

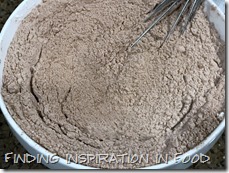
In a bowl whisk together flour, cocoa powder, baking powder, and salt.

IMG_2018 (800x600)IMG_2020 (800x600)

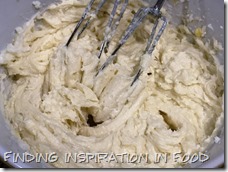
In another bowl with an electric mixer beat together butter and sugar until light and fluffy and beat in rum.

IMG_2019 (800x600)IMG_2021 (800x600)IMG_2023 (800x600)IMG_2024 (800x600)

Beat in eggs, 1 at a time, beating well after each addition.

IMG_2025 (800x600)IMG_2026 (800x600)IMG_2027 (800x600)IMG_2028 (800x600)

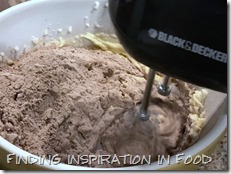
Gradually beat in flour mixture and beat just until dough is blended well.

IMG_2029 (800x600)IMG_2030 (800x600)

Form scant 1/4-cup measures of dough into balls and arrange about 3 inches apart on lightly greased baking sheets.

IMG_2031 (800x600)IMG_2032 (800x600)

Bake cookies in middle of oven in batches until tops begin to crack, about 15 minutes, and transfer with a metal spatula to racks to cool.

Makes approx. 2 dozen cookies

IMG_2034 (800x600)IMG_2038 (800x600)

Friday, December 30, 2016

Dark Chocolate Chip Espresso Cookies

IMG_8592 (800x600)

I really loved these little cookies, and not to mention super easy to whip up! I made them for some teachers and put them in the large pretzel bags which you’ll see at the end of the post. They fit nicely in the goody boxes I made.


Dark Chocolate Chip Espresso Cookies

(Adapted from Authentic Suburban Gourmet)

I made 5 dozen 1” balls


Printer Friendly Version


Makes about 18 cookies


2 sticks cold and cubed unsalted butter

1 1/4 cup granulated sugar

2 eggs

1/2 cup good quality dark cocoa powder

2 1/4 cups all-purpose flour

1 tsp Kosher salt

1 teaspoon baking powder

1 Tablespoon Espresso powder

2 cups semi-sweet chocolate chips (I used 12oz Ghiradelli semi-sweet)


Preheat oven to 350 degrees


In bowl of electric mixer fitted with paddle, cream together butter and sugar until well blended and fluffy.


IMG_8578 (800x600)IMG_8579 (800x600)


Add eggs and beat until well-incorporated, then beat in cocoa powder and espresso powder.


IMG_8580 (600x800)IMG_8581 (600x800)IMG_8582 (600x800)


Mix in flour, salt and baking powder until just combined.


 IMG_8583 (800x600)


Gently fold in remaining ingredients.


 IMG_8584 (800x600)


Transfer dough to clean work surface and gently mix dough by hand to ensure even distribution of ingredients. I used a 1 inch cookie scooper and put two balls together and rolled until one large ball. Laid on cookie sheet and slightly flattened.


 IMG_8585 (600x800)IMG_8586 (800x600)IMG_8587 (800x600)


Bake in the preheated oven 10 to 12 minutes depending on how gooey you like the middles and longer is crispier.


Let cool on a rack and store in an airtight container.

IMG_8591 (800x600)IMG_8714 (800x600)

Friday, July 1, 2016

4th of July Cookies, Crafts and Fruit

IMG_9718 (800x600)

Are you ready for the 4th of July? If you are looking for some last minute things to bring to that pot luck party I’ve got you covered!

First up are some cookies I made this week. My son finally tried pop rocks for the first time and loved them. These cookies are super easy to assemble. All you need is to bake sugar cookies, ice them and then sprinkle on some red and blue pop rocks. They’ll crackle in your mouth like the fireworks on the 4th of July!

IMG_9708 (800x600)IMG_9709 (800x600)IMG_9719 (800x600)

We had a 4th of July celebration with our co-op group this week and one of the moms made this cute fruit tray flag!

IMG_9691 (800x600)IMG_9692 (600x800)

Staying at home with a toddler is no easy chore. Although our calendar stays pretty full between all the playgroup activities, co-op group, playdates, etc. There’s still always some down time I’m trying to fill. Luckily my son likes to craft and paint and this was an easy one to make fireworks using a toilet paper roll. It’s also a great motor skill working on scissor usage to cut all the lines. I just put some read and blue paint on a plate and let him dip away. Before it dries you can add some glitter to really make the picture sparkle.

KYWY5401

Here’s another alternative we did with our co-op group using straws rubber banned or taped together.

IMG_9696 (600x800)IMG_9697 (800x600)

The next one we did was a flag. I don’t have a finished picture of how it turned out, but I’ll show you examples of how I intend for the finished project to look.

IMG_9354 (2)IMG_9356

Once it dries I’ll add white stars to the blue section and then print the following saying I found HERE. I like to do handprint crafts around a holiday to add to the scrapbook showing his hand or feet sizes growing.

4th of July Handprint Flag Craft Wording

Friday, August 7, 2015

Mini Fruit Pizzas with Lemon Cream Cheese Frosting

IMG_2648 (800x533)

Last weekend I had the pleasure of co-hosting a double baby shower for 2 moms in our playgroup who are expecting their second child. I wanted to do a variety of food with a little something for everyone. I’ll be posting the chicken salad recipe as well as the bread sticks next week. For the Roasted Veggie Wraps click HERE and for the Spinach Artichoke Dip click HERE.

IMG_2664 (800x533)IMG_2665 (800x533)

IMG_2670 (800x533)IMG_2667 (800x533)

IMG_2666 (800x533)IMG_2661 (800x533)

Here’s a look at the dessert table with diaper cakes for each mom. Also a great hint I learned from my friend that made the diaper cakes is to stick a bottle of wine in the middle so it’s something for mom to enjoy later and makes it a perfect center base to wrap the diapers around.

IMG_2689 (800x533)

You’ll fall in love with these cookies! They have a nice sweetness to them, but the fruit really gives it a great Summer and Spring like flair to them. Since I was short on time I just used the Pillsbury Sugar Cookie dough in the refrigerated section of HEB.

Mini Fruit Pizzas with Lemon Cream Cheese Frosting

(Adapted from Cooking Classy)


Printer Friendly Version


1 1/2 cups all-purpose flour*

1 1/2 cups cake flour

2 tsp baking powder

1/2 tsp salt

1 cup unsalted butter, softened

1 1/4 cups granulated sugar

2 large eggs

2 tsp vanilla extract

Sliced fresh fruit, for topping**


Lemon Cream Cheese Frosting

8 oz cream cheese, softened

1/2 cup unsalted butter, softened

2 tsp lemon zest

1 Tbsp fresh lemon juice

1/2 tsp vanilla extract

1/4 tsp lemon extract

1 1/2 cups powdered sugar


In a mixing bowl, whisk together flour, then sift in cake flour and add baking powder and salt. Whisk 20 seconds, set aside.


In the bowl of an electric stand mixer, fitted with the paddle attachment, whip together butter and sugar until creamy and slightly pale and fluffy, about 1 - 2 minutes. Mix in eggs one at a time, then blend in vanilla. With mixer set on low speed, slowly add in dry ingredients and mix until combined. Divide dough into two equal portions, shape each into a disk and cover with plastic wrap. Chill 3 hours or up to overnight.


Preheat oven to 375 degrees. Dust a clean working surface with a fair amount of flour, remove one dough from refrigerator, unwrap and place on floured surface. Sprinkle top with flour and roll to 3/8-inch thickness (right between 1/2-inch and 1/4-inch). Cut into 2 1/2-inch rounds then transfer to a Silpat or parchment paper lined baking sheet. Bake in preheated oven 7 - 9 minutes (cookies won't become golden so don't over-bake. You want them slightly set but they should still make an indentation when touched). Remove from oven and allow to cool on baking sheet 2 minutes, then transfer to a wire rack to cool completely. Repeat process with remaining dough.


Once cookies are cool, frost with Lemon Cream Cheese Frosting. Decorate with diced fruit just before serving.


For the Lemon Cream Cheese Frosting:


In the bowl of an electric stand mixer, fitted with the paddle attachment, whip together butter, cream cheese and lemon zest until smooth and fluffy. (I used dried lemon peel found near the seasoning isle instead of fresh so that’s what the brown sprinkles are)


 IMG_2600 (800x533)IMG_2601 (800x533)


 Mix in lemon juice, vanilla, and lemon extract.


 IMG_2602 (800x533)IMG_2603 (800x533)


Add powdered sugar and whip mixture several minutes longer until fluffy.


 IMG_2604 (800x533)IMG_2605 (800x533)


*Scoop and level each flour, vs spoon an level. All of my recipes use the scoop and level method but I thought I'd throw it out there because it's very important for this recipe so your dough isn't sticky. If you live in high humidity you may even want to add in an additional 1/4 cup of flour.


**I recommend using berries (strawberries, raspberries, blueberries, blackberries, huckleberries, etc), kiwi, pineapple, peaches or mangos and dicing fruit into small pieces (except kiwis - slice those).

IMG_2648 (800x533)IMG_2688 (800x533)IMG_2685 (533x800)

Can’t wait to meet these two little bundles of joy!!!

IMG_2703 (800x533)