Showing posts with label sandwiches. Show all posts

Wednesday, March 7, 2018

Hot Ham & Swiss Croissants

IMG_9486 (800x600)

I made this as part of our New Year’s meal and it came out sooo good. It’s super simple and easy to make when you are in a pinch. If you saw my post on social media, I apologize for the delay in post. It’s been a draining month in our house and I think we are finally back into full swing of things so I have a lot of catching up to do. Forgive me as I do my easier post first lol.

Hot Ham & Swiss Croissants

(Adapted from Life with the Crust Cut Off)

Printer Friendly Version

2 Tablespoons Dijon Mustard
1 Tablespoon honey
1 Tablespoon brown sugar
4 croissants split
8 slices swiss cheese

Pound deli ham any flavor you like and you might not end up using the whole pound, depends on how thick you like your sandwiches

Mix the mustard, honey and brown sugar together.
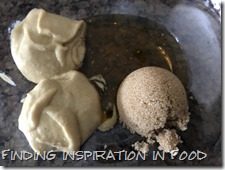
IMG_9478 (800x600)IMG_9481 (800x600)

Spread the honey mustard mixture on each side of the four split croissants.

Place a slice on swiss on each half of the croissants.

Top the bottom half of each croissant with however much ham you like.

Place two halves back together.

IMG_9482 (800x600)IMG_9484 (800x600)IMG_9483 (800x600)

Wrap in foil.

Place in fridge for later or Place in a 350 preheated oven for 10-15 minute.

IMG_9485 (800x600)IMG_9487 (800x600)

Wednesday, January 24, 2018

Pressed Italian Picnic Sandwiches

IMG_8356 (800x600)

Usually when we head out of town on Friday nights I pack a sandwich for the car ride so we don’t have to stop and eat fast food. You get sick of the same ole same so I like to change it up with new ideas. I liked this one because it is best done in advance and doesn’t need to be warmed up. It’s super filling so if you need a hardy packed picnic this is perfect!

Pressed Italian Picnic Sandwiches

(Adapted from Seasons & Suppers)


Printer Friendly Version


1 Ciabatta Baguette cut in half to make approx. two 12-inch pieces
2-3 Tbsp butter
3 red peppers (I used the jarred ones)
1 large bunch of arugula, rinsed and patted dry rinsed and patted dry
2 cups bocconcini slices
10 oz Assorted Italian deli meats, such as Soppressata Salami, Capocollo and Napoli Salami (I used pepperoni, Italian dry salami, prosciutto, dry coppa)
Balsamic Vinegar
Olive Oil
Salt and Pepper, to taste


To roast the red peppers: Set your oven to the Broil setting. Slice the sides off the red peppers and place skin side up on a baking sheet (*I like to trim the ends so they lie as flat as possible, as they will brown better than pieces that are sloped). Place under the broiler until very well charred (blacon top, about 10 minutes (watch closely after 5 minutes. You'll want them to be mostly blackened on top.) Remove from the oven and immediately place the peppers in a plastic ziploc bag. Pop in the refrigerator for 30-40 minutes. Remove peppers from bag and peel off the blackened skin with a knife. Discard the skin and slice the peppers in to strips. Place in a bowl and drizzle with a bit of olive oil and sprinkle with salt and pepper. Set aside.

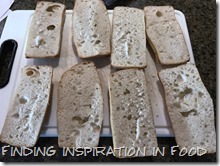
To prepare the sandwiches: Cut your ciabatta in half and butter each piece (or you could brush with a bit of olive oil, if you prefer, but butter will help prevent moisture from getting into the bread.

IMG_8329 (800x600)IMG_8330 (800x600)

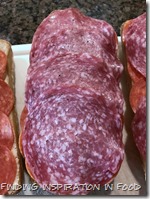
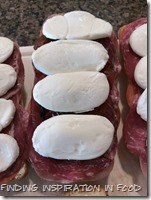
Place a generous layer of cold meats (4-5 over-lapping layers). Top with cooled roasted red pepper strips. Take your Bocconcini slices and place on a piece of paper towel. Top with another piece of paper towel and pat to dry a bit. Top the red peppers with a layer of the Bocconcini slices. Drizzle some balsamic vinegar over the Bocconcini slices and sprinkle with salt and pepper. Top with a generous layer of arugula. Top with top slice of ciabatta.


IMG_8331 (800x600)IMG_8332 (800x600)IMG_8333 (800x600)IMG_8334 (800x600)IMG_8335 (800x600)IMG_8336 (800x600)IMG_8337 (800x600)IMG_8338 (800x600)IMG_8339 (800x600)

Wrap each sandwich tightly with plastic wrap and place on a platter or baking sheet. When all the sandwiches are prepared, place the platter in the refrigerator. Place a heavy skillet on top of sandwiches to apply weight (if you don't have a heavy skillet, top with another baking sheet and place some large cans on top for the weight).


IMG_8341 (800x600)IMG_8343 (800x600)IMG_8344 (800x600)

Refrigerate at least 6 hours or ideally, overnight.

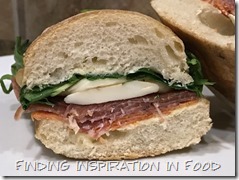
When ready to serve, remove from plastic wrap. If desired, you can trim the sides and ends of the sandwiches to make neat sides and to enjoy the wonderful colors of these sandwiches.


IMG_8354 (800x600)

Friday, January 19, 2018

National Cheese Lover’s Day is Tomorrow

IMG_0065 (800x600)

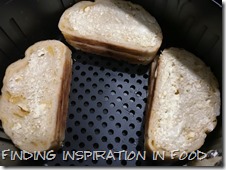
I’ve had an air fryer for a while now. I don’t seem to use it as much as I should. I try to be healthy where I can, but the air fryer doesn’t make me want to give up my fryer for good. Somethings just taste better deep fried and that’s ok. I had a friend suggest doing grilled cheese in the air fryer and it’s the best she’s ever had. Thought I would give it a go. It takes about 10 mins to cook, which for one sandwich is a long time, but when making 3 I figure what the hey. I overcooked mine a little, but they are pretty darn good. I followed the directions of the internet and put butter on mine, I think this is what made it crisp up more than I liked. My friend said hers softened with the grease being pulled through the bread from the cheese. Next time I’ll do that instead. I also used a cheese bread which may have been the other culprit to making the bread extra crispy.

There’s really no recipe except flipping it half way through the 10 minutes.

 IMG_0058 (800x600)IMG_0060 (800x600)IMG_0061 (800x600)IMG_0062 (800x600)IMG_0063 (800x600)IMG_0065 (800x600)


Wednesday, September 13, 2017

Short Rib Sandwiches

IMG_1687 (800x600)

I used our last package of short ribs to make this and I really wish I had more than one package, because it’s AMAZING!! Holy smokes this blows away any others I’ve made. We even cut slices of the baguette to make crostini's with the leftover short ribs. Any way you eat this you won’t be disappointed!

Short Rib Sandwiches

(Adapted from The Pioneer Woman)


Printer Friendly Version


2-1/2 pounds Beef Short Ribs

Salt And Pepper

Olive Oil, For Searing

1 whole Medium Onion, Finely Diced

3 whole Carrots, Finely Diced

3 cloves Garlic, Minced

1 cup Red Wine

1 cup Beef Broth

1 whole Baguette Loaf (or Smaller Crusty Buns)


Preheat oven to 300 degrees.


Salt and pepper the short ribs. In a heavy pot, heat a couple of tablespoons of olive oil over high heat. Sear the short ribs on all sides over about 2 minutes. Remove to a plate.


IMG_1666 (800x600)IMG_1664 (800x600)IMG_1665 (800x600)


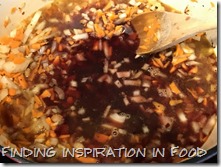
Reduce heat to medium high. Add onions, carrots, and garlic and stir to start cooking.


IMG_1667 (800x600)IMG_1668 (800x600)


After a minute or two, pour in the wine and broth and stir to combine.


IMG_1669 (800x600)

IMG_1670 (800x600)


Set the short ribs back in the pot, put on the lid, and place in the oven for 2 1/2 to 3 hours, or until short ribs are tender and literally falling off the bone.


IMG_1671 (800x600)IMG_1676 (800x600)


If you have time, allow them to cool, then store in the fridge for several hours so the fat will congeal on top. Once it's hard, remove it with a spoon and discard (some of the juice and a few pieces of onion and carrot will come out with the fat, but that's okay.) Reheat on the stovetop, then shred the short ribs.


IMG_1684 (800x600)


Toast the baguette until warm, then split down the middle. Spoon the short rib meat down the length of the baguette, then spoon the veggies and some sauce over the top. Place the top of the baguette on top, then slice sandwich into pieces with a sharp serrated knife. Serve immediately!


(If you don't have time to refrigerate, you may skim as much fat off as you can, then just shred the short ribs immediately and serve as above.)


Variation: Melt brie cheese on top of the sandwich!


IMG_1685 (800x600)IMG_1686 (800x600)

Wednesday, September 6, 2017

Slow Cooker Zesty Barbecue Chicken

IMG_1971 (800x600)

Here’s another easy crockpot dish for busy nights. I doubled the recipe and used leftovers on a baked potato as well. Both ways where tasty.

Slow Cooker Zesty Barbecue Chicken

(Adapted from Sweet Little Bluebird)


Printer Friendly Version


2 to 2 1/2 pounds boneless, skinless chicken breasts (fresh)1 cup onion, chopped (optional, but highly recommend)

1 cup Sweet Baby Ray's BBQ Sauce

1/2 cup Kraft Zesty Italian Dressing

2 tablespoon Worcestershire sauce

1/4 cup light brown sugar


Lightly spray slow cooker with non-stick cooking spray.


Place chicken in single layer in slow cooker.


IMG_1820 (800x600)


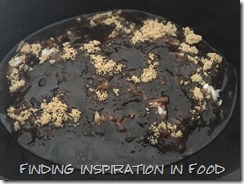
Top chicken with diced onion (optional). Mix remaining ingredients (bbq sauce, Italian dressing, Worcestershire sauce and brown sugar). Pour sauce over chicken.


IMG_1837 (800x600)


Cook on high for 3 to 4 hours, until chicken is tender and easy to shred. 


When ready, shred with two forks.


IMG_1946 (800x600)IMG_1949 (800x600)


Reduce slow cooker temperature to low and cook an additional hour. Cooking the extra hour allows the yummy sauce to absorb into the chicken.


Serve chicken piled high on your favorite rolls along with your favorite barbecue sides - coleslaw, potato salad, baked beans, baked potatoes, french fries, veggies, salad and more. Enjoy!


Tips

Use leftover chicken to make BBQ pizza, serve on top of rice, baked potatoes or salad. Also makes an awesome wrap.


IMG_1970 (800x600)