Showing posts with label Guest-Bloggers. Show all posts

Monday, September 26, 2011

Beef Burgundy

DSC_0189

First I want to congratulate our winner of the autographed copy of The Casserole Queens Cookbook……Teslaca!!! Loved hearing all of your favorite casseroles, you’ve given me some new ideas to try. Don’t worry if you didn’t win here’s one of the recipes from the book and I might share a few more later on down the road. I also have another giveaway starting Friday so swing back by to check it out!

I want to introduce you to a dear friend of mine Laura who has been a faithful friend, taste tester and supporter of all things I do. She’s been sweet enough to guest blog for me today (she’s also crafty and I just adore her so be sure to check out her blog)! We started out as co-workers and now I’m thrilled to say she’s done me proud by taking over my spot in the office when I left.

Img2193 (Medium)

Howdy ya'll, I'm Laura coming to you from Peace Love and Funky Junk, my fresh from the farm blog. I've been lucky enough to be friends with Allison for about four years, and I've truly enjoyed every minute of it. I am truly inspired by her, and the amazing dishes she creates. I'm also lucky enough to get to sample the goodies from time to time. Boy does that excite me.

Allison shared my Christmas present with me early, and man alive was I excited. I mean who doesn't love getting Christmas presents months in advance?! The best part was under the holiday wrapping...a signed copy of The Casserole Queens Cookbooks! Best gift a girl with a 9X13 pan could ever ask for. Seriously. I couldn't wait to get home and make out my grocery list.

First delish dish I tried was the Beef Burgundy. Located on page 68 if you're lucky enough to get your hands on a copy of this little jewel.

DSC_0173

Beef Burgundy
(Adapted from The Casserole Queens)
Makes 8 Servings

Printer Friendly Version

8 slices of bacon, chopped
3 lbs stew meat or boneless beef chuck
Salt
1/4 teaspoon fresh ground black pepper
1/3 cup all-purpose flour
2 yellow onions, chopped
1 lb carrots, peeled and cut into 1 inch pieces
1 lb sliced button mushrooms
5 large garlic cloves, minced
3 1/2 cups beef broth
1 bottle dry red wine, preferably Burgundy
1/3 cup chopped fresh thyme leave
1 tablespoon firmly packed light brown sugar
1 tablespoon tomato paste
1 bay leaf

DSC_0172

Wheew, I know that sounds like a lot. Trust me it's worth every single bit of work in purchase and prep!

Look I'm going to give you the quickie version of this, but if you click on the printer friendly version above you can print the full recipe.

Preheat your oven to 350 degrees F.

Get out your muscles and move that big 'ol Dutch oven to the stovetop.

Cook up your bacon, take out to drain on paper towels, leave grease in the pot.

DSC_0174

Brown your veggies in the grease. Remove.

Dredge the stew meat in the flour...brown in the pot, and remove.

DSC_0176

Place 1 cup beef broth into the pot, scraping the bottom on the pan/pot to make a delish reduction sauce.

clip_image001clip_image002

Once sauce boils, place meats and veggies into the pot, pour in the rest of the beef broth and the entire bottle of wine, minus a few sips for good measure. Toss in herbs and salt and pepper.

clip_image001[4]

Place that big 'ol heavy thing into the oven for 2 hours.

clip_image001[6]

It'll come out hot and tender. No doubt the best thing eva. It's no doubt worth the time it takes waiting for it to get done.

DSC_0188

Being from the south I served mine on top of sweet cornbread, you could do rice.

DSC_0189

Friday, August 12, 2011

Food Labels: Which Can You Trust?

I always like to share recipes or products with you that I find useful. This time I have a special guest who has some knowledge on the food labels. James Kim, a writer for foodonthetable.com offered to submit a guest post on “Food Labels: Which Can You Trust?” for my blog and I am more than happy to have him share what he knows! Welcome James, and I hope all of you find his post helpful and informative.

(I was not sponsored by Food on the Table nor do I have any connection with them.  I just think it is an important topic to discuss.)

The Good (and Bad) of Food Labels

It’s fairly well accepted at this point that food labels are there to help us. And it’s true: they are. However, that doesn’t mean that all labels are completely honest or that there aren’t some that are deliberately misleading. If you want to be able to enter into your meal planning with as much confidence as possible, you need to have some basic knowledge of the main good and bad labels out there.

So, what should you definitely not trust? “Natural” and “local.” Those both seem like pretty good labels, though, so one at a time. First, you shouldn’t put much stock in the label “natural” because it doesn’t really mean much at all and isn’t very restrictive for food manufacturers. According to the FDA, natural food is “food [that] does not contain added color, artificial flavors, or synthetic substances.” Rather than checking for this label, you should read over the ingredients list and judge it for yourself to be safe.

Then you have the label “local.” Much like natural, this label doesn’t really say anything. The common opinion is that local means that an item must have been grown within 100 miles of where it’s being sold. However, no one checks to see if products labeled with this meet that type of requirement. In other words, the only time you can truly know that you’re buying local product is by going to the closest farmer’s market where you can interact with the person who actually grew it.

Those two labels are some of the worst, so don’t worry that everything you see is some trick. In fact, you probably see one of the best labels every day: “certified.” Certified is used on meat products and, as explained by the Food Safety and Inspection Service, certified products are judged according to “quality characteristics” like the grade of the meat. At first you might be leery because all those criteria aren’t the clearest, but you really don’t have anything to worry about. Without fail, certified meat is significantly better than meat that isn’t certified.

One label that has picked up a lot of steam lately is “organic.” This is a very intuitive label, as organic food is simply “produced without using most conventional pesticides; fertilizers made with synthetic ingredients or sewage sludge; bioengineering; or ionizing radiation.” The farms and processing facilities involved in the life of an organic product must be examined by a government-approved group, too, leaving no doubt as to the accuracy of the label. Even better, the label you see changes based on exactly what percentage of ingredients are organic in any product. These different labels are: “100% organic” for 100%, “organic” for 95% or more, “made with organic ingredients” for 70% or more and “contains organic ingredients” for 70% or less.

You’ve probably seen it most often when hearing about coffee; “fair trade” is the last of the labels here. Given by the company FLO-CERT, the “fair trade” label means that everyone who dealt with the product from field to store was given their “fair” share. In other words, small farmers of poverty-stricken countries are protected from big corporations bullying them out under fair trade guidelines, which is definitely a positive.

In the end, food labels really are there to help you. Yes, they can be tricky and some are basically lying on purpose, but if you go shopping armed with this knowledge, you’ll be well on your way to picking out the good from the bad with ease.

James Kim is a writer for foodonthetable.com.  Food on the Table is a company that provides online budget meal planning services.  Their goal is to help families eat better and save money.

Wednesday, October 13, 2010

Longtail Halloween Treat

Our next guest I originally met through a cooking contest site I'm a member of. She specializes in Halloween which is my favorite holiday so I knew I had to have her as a guest at some point. She just published a book which can be found on Amazon HERE. Please be sure to check out Beth's blog at Hungry Halloween and check out all her great ideas for your next party! She also has step by step pictures on how to make this Longtail if you need more details. Now over to Beth -

If you are looking for party food that might at first gross out your squeamish guests, but tastes so yummy they won't be able to resist, this is the recipe for you. Longtail is created from a combination of chocolate cream filled cookies and cream cheese with chocolate chip eyes and pink tinted frosting tail, nose, and toes.

Longtail
(Adapted from Hungry Halloween)

Printer Friendly Version

Ingredients:

18 ounces chocolate cream filled cookies
8 ounces cream cheese, softened and divided
2 tablespoons powdered sugar
pink paste or gel food coloring
2 chocolate chips

Special Equipment Needed:
food processor
plastic wrap
disposable pastry bag
#12 and #13 decorating tips
pastry bag coupler

Instructions:
Pour cookies into the bowl of a food processor. Pulse until the cookies are fine crumbs. Remove 2/3 cup crumbs and set aside. Add 7 ounces cream cheese to the food processor and pulse until mixture is completely combined, scraping bowl as needed.

Reserve about 3 tablespoons of the cookie/cream cheese dough for Longtail's legs and ears. Pour the remaining dough onto a piece of plastic wrap. Use the plastic wrap to help you form the dough into a long oval. Unwrap.

Pour reserved cookie crumbs into a long shallow container. Roll dough oval into crumbs, shaping the body as you go. Place on a serving platter.

Press the two chocolate chips onto either side of Longtail's face for his eyes. Pinch off small amounts of the reserved dough and roll into 2 short skinny front legs and two longer wider back legs. Attach to body. Pinch off two small balls of dough and flatten them into ears. Attach to head.

Combine the remaining 1 ounce of cream cheese with the powdered sugar and one very small drop of pink food coloring. Stir until well combined. Spoon pink cream cheese into a pastry bag fitted with a coupler and # 12 decorating tip. Pipe a long tail onto the back of Longtail's body. Start by setting the decorating tip at Longtail's back end. Squeeze and as the frosting comes out of the tip, pull out and around the body tapering off as you go. Pipe on a nose and pipe some pink onto each ear. Remove the #12 decorating tip and replace it with a #3 tip. Pipe on Longtails' toes. Keep refrigerated for up to a week. Bring to room temperature before serving.

NOTE: If you don't have any experience piping frosting, you can create Longtail's nose, toes, and tail out of pink taffy or any pink chewy candy. Just soften the candy in the microwave for 3 seconds then cut and mold into the desired shape. (Be careful as candy can get very hot in microwave.)

Friday, October 8, 2010

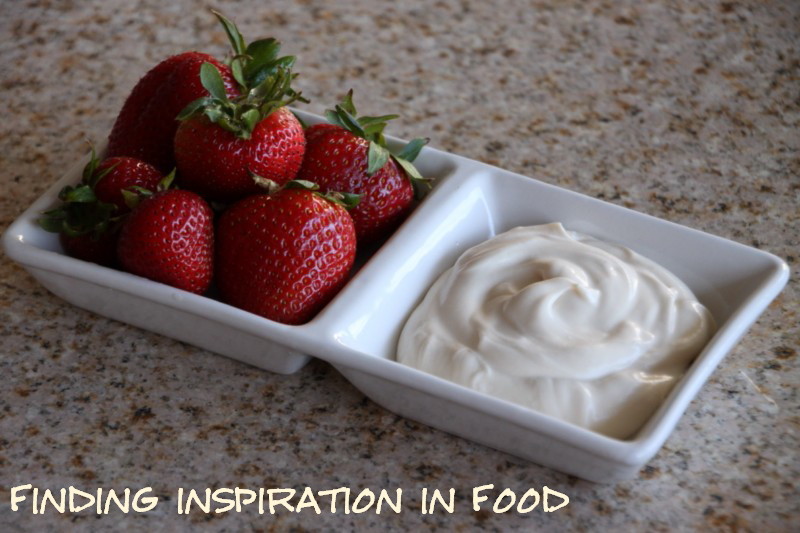
Brandy Dip with Strawberries

I want to introduce you all to a good friend of mine Christen. I love when she brings this dish over, because I'm in love with La Madeline's strawberry dip. I could eat a whole helping of this if I was left alone with it. I'll be back in control of my blog on Wednesday, October 20th with a full review of everything I've been up to, but until then I'll have a few guest bloggers that I want to introduce you too and I hope you enjoy the recipes they have to share and I do hope you visit their blogs and show them some love. Now over our first blogger Christen -

I can’t tell you how excited I am that Allie asked me to be a guest blogger! I love reading her blog and “borrowing” her recipes and they always inspire me to look at ingredients in a whole new light. I decided to pick a quick and easy recipe that's always a hit and is absolutely delicious. The Strawberries Romanoff dip is fantastic with strawberries, but really you could use just about any fruit or lady fingers. It’s easy for parties and really tasty.

La Madeline Strawberries Romanoff Recipe
(adapted from Copycat Recipes)

Printer Friendly Version

1 cup sour cream
6 tablespoons brown sugar
2 tablespoons of brandy
1 cup of heavy cream
6 tablespoons of sugar
Fresh strawberries for dipping
Mix sour cream, brown sugar and Brandy in a bowl.

In a separate bowl, whip cream until starts to thicken and add the sugar. Continue to whip until thick.

Fold whipped cream into sour cream mixture and blend well.

Serve with fresh strawberries.